The
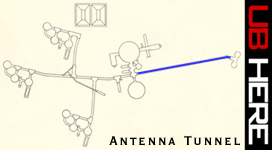
antenna tunnel is a steel structure connecting tunnel junction #10
(the main tunnel junction) to the antenna terminal. A type 'B'
tunnel, the antenna tunnel is constructed of 5 gauge corrugated steel
liner with a 9-foot 6-inch inner diameter and a simple floor of
poured, leveled concrete. At approximately 553 feet in length (nearly
one-tenth of a mile), it is the longest unbroken stretch of tunnel in
the Titan I complex.
|

Drawing
showing the rather simple architecture of the antenna tunnel.
There is a jog of about 30 degrees at the far end of the tunnel just
before the antenna terminal.
|
For
the Lowry sites, the tunnel sections were assembled, bolted
and welded at a fabrication yard set up at nearby Buckley Air National
Guard Base. From there the sections were trucked to the
construction site and emplaced with cranes and heavy equipment before
being permanently welded together.
|
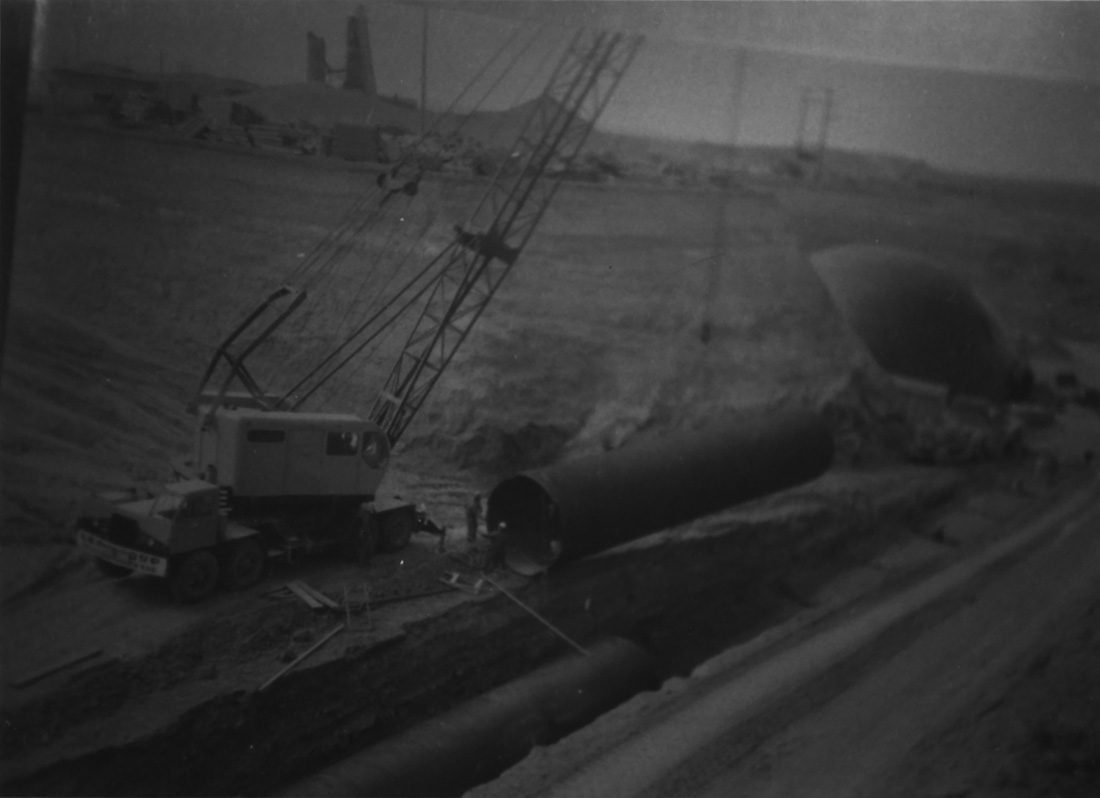
Construction
photo showing a prefabricated section of the antenna tunnel being placed
by crane
|
In
addition to safely conveying missile crews under the Earth between the
protected warrens of the main tunnel junction and the antenna silos,
the antenna tunnels also carried vital services as well.
Power,
water, communications, guidance circuits and other links to the
control center as well as waste water and sewage all travel along the
antenna tunnel in numerous pipes, cables and conduits arranged on both
sides of the tunnel as well as the ceiling.
|
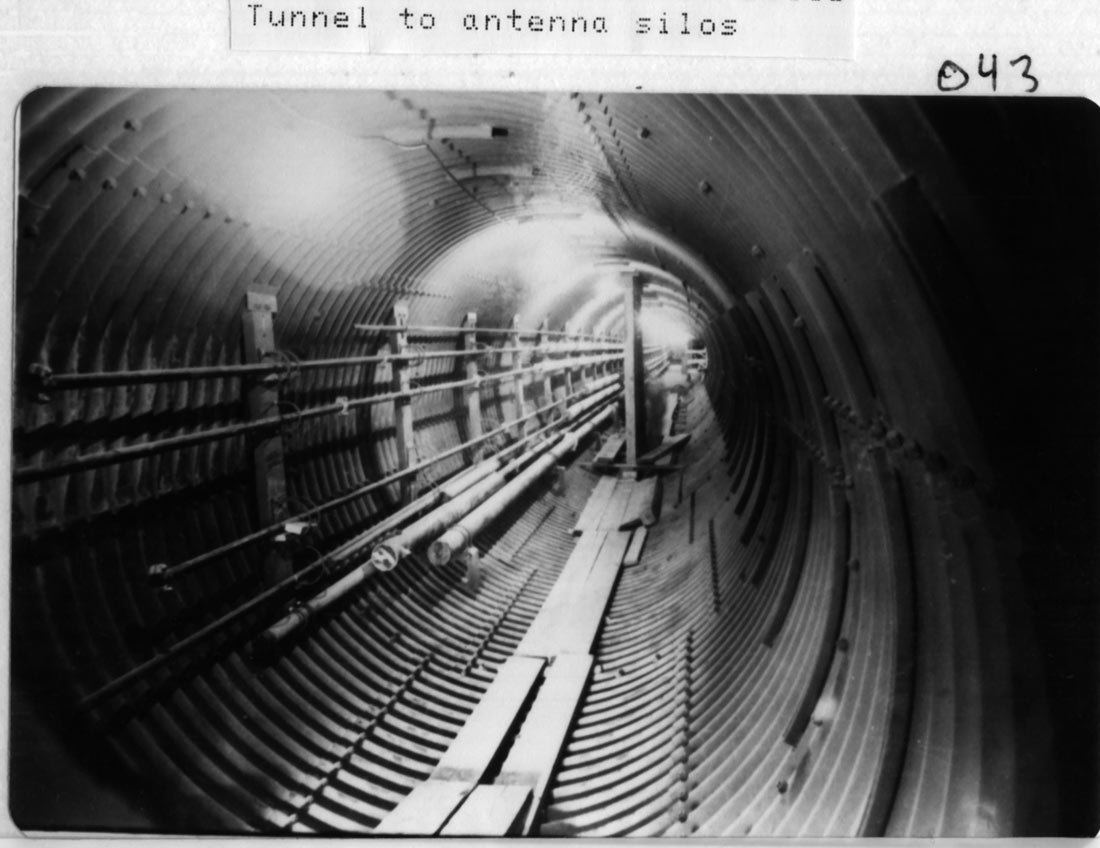
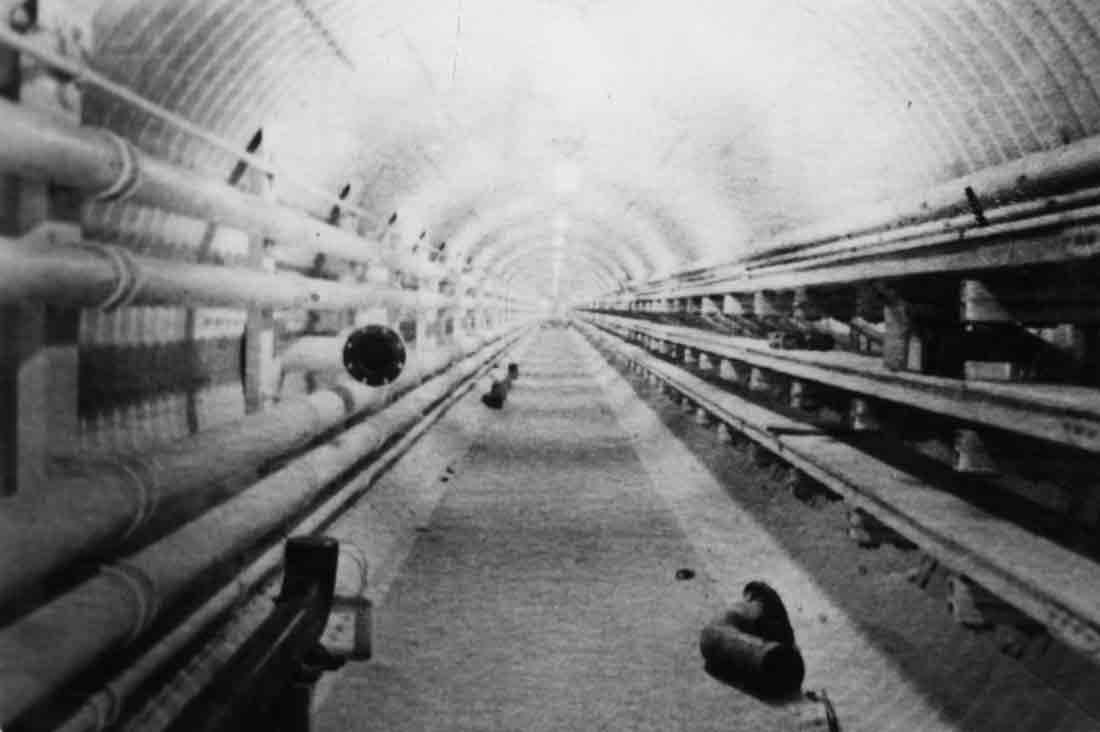
Construction
photo showing the antenna tunnel looking toward the antenna
terminal. Plumbing and wiring conduit are partially installed but
the cable trays have yet to be added on the right side of the tunnel. Workers
have added planks for better footing and easier movement of equipment
and carts along the tunnel. Concrete will be poured later to make
a level floor along the tunnel.
Photo
courtesy of Fred Epler
|
|
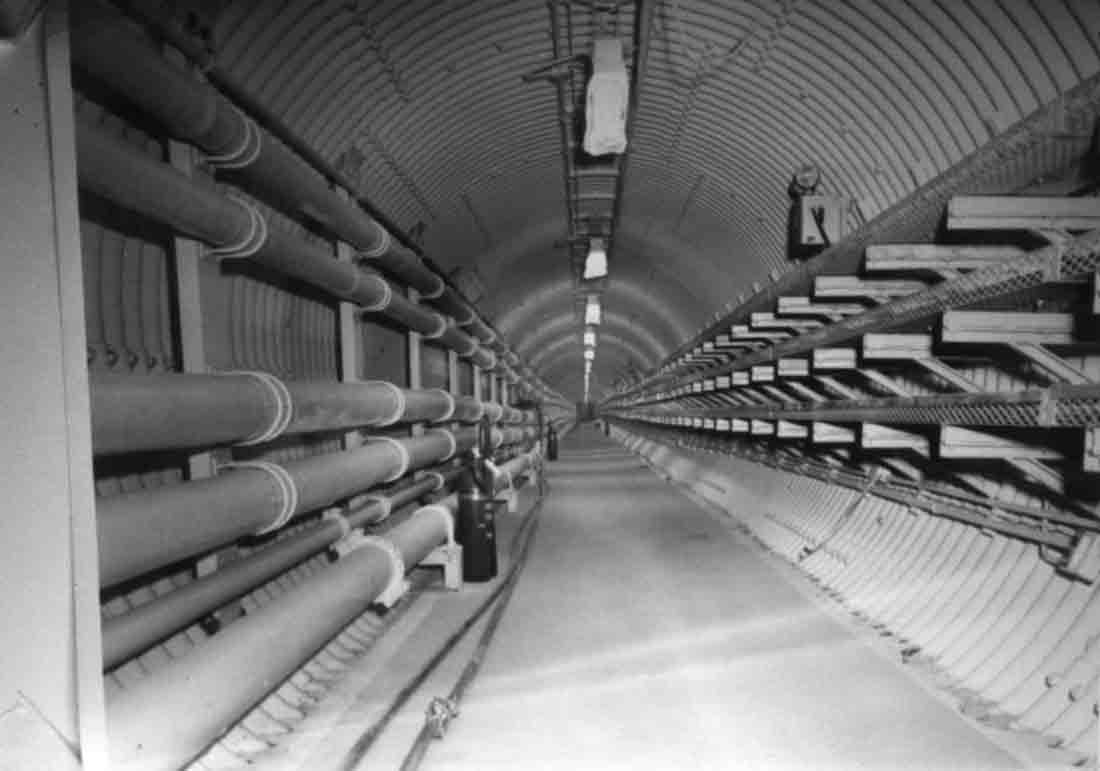
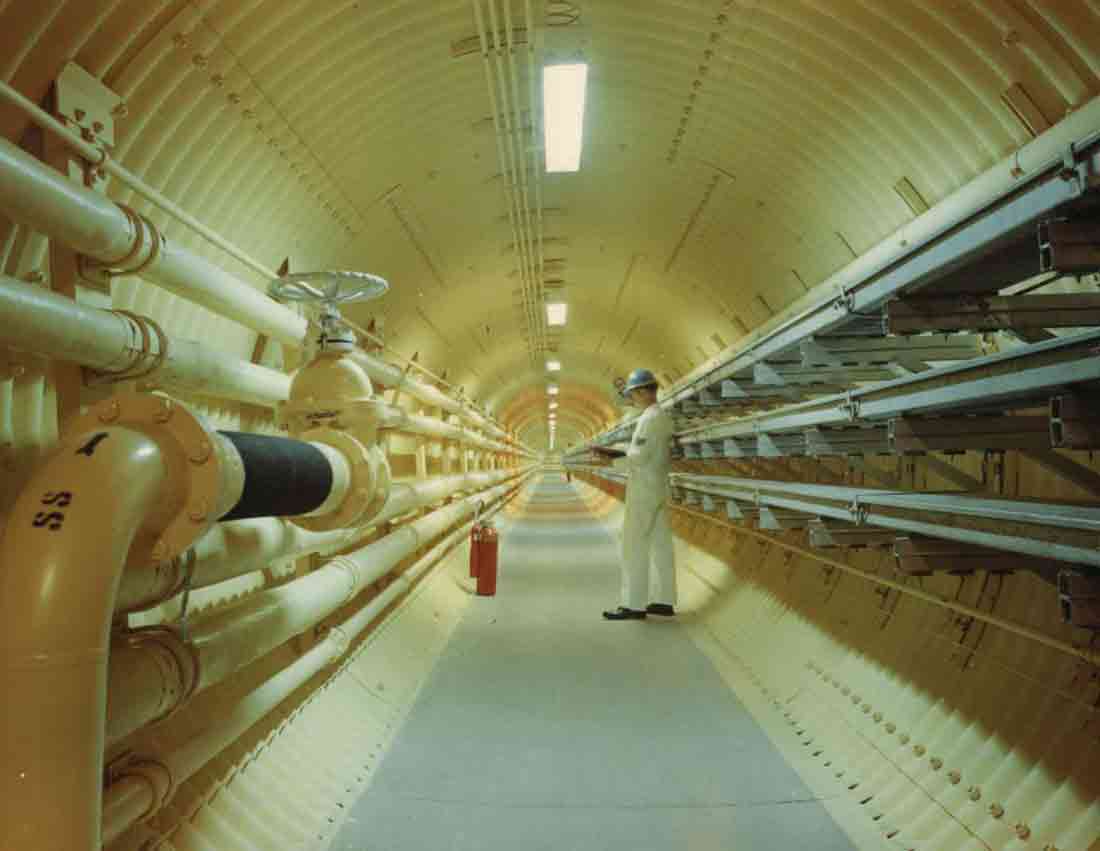
Construction photo
looking toward the antenna terminal. The floor has been poured and set
and the cable trays (right) have been installed.
|
Lacking
any other means of fire suppression, the antenna tunnel had fire
extinguishers placed at regular intervals for combating any incendiary
incidents that might occur. Admittedly, in a steel tube with a
concrete floor there isn't much combustible material around.
Electrical fires were really about the only event that would require
extinguishing in this area.
The
cable trays connect the Control Center and the rest of the
complex to the antennas and their equipment. This tunnel is so
long I'm surprised they didn't need signal boosters (repeaters) along
its length!
|
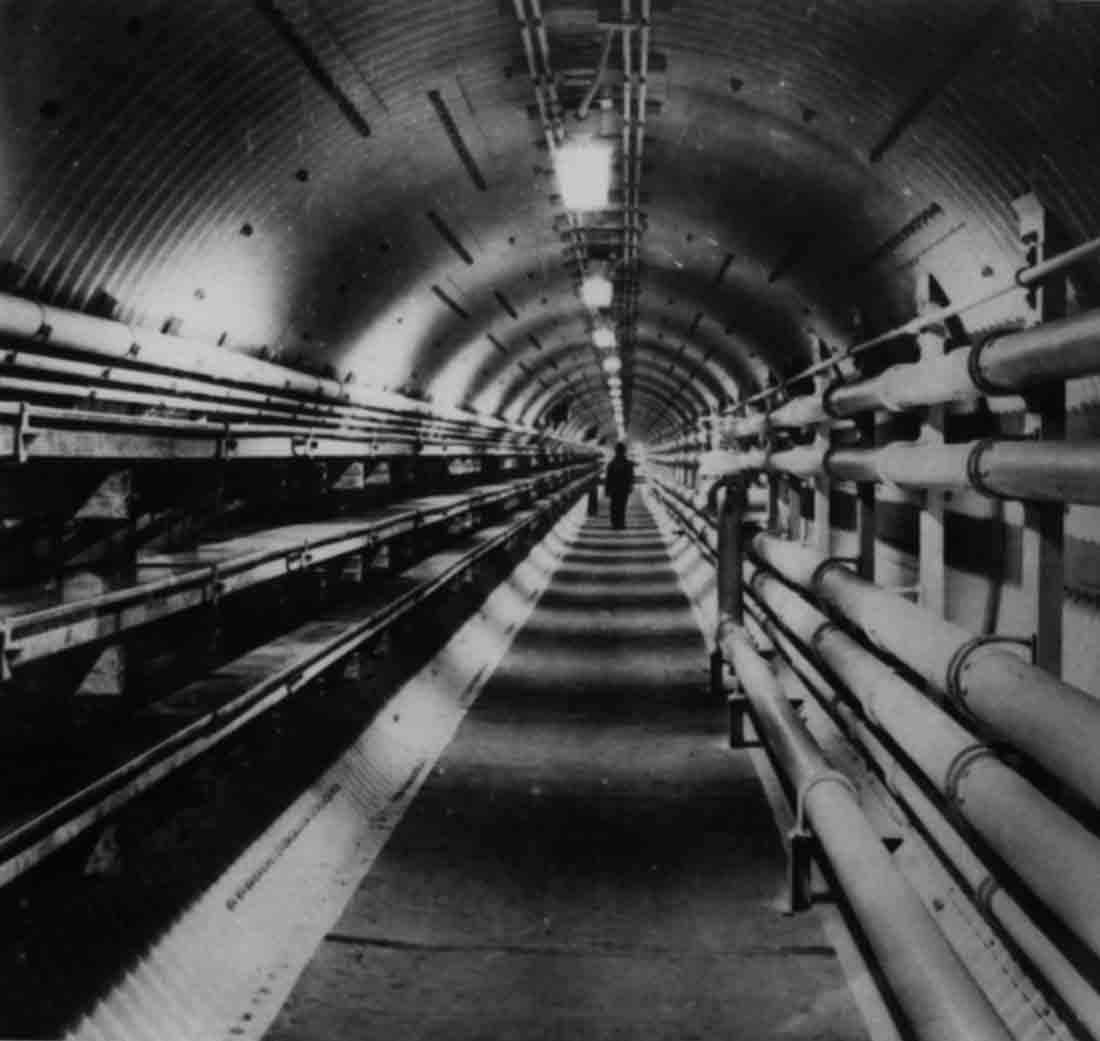
A
rather ghostly shot looking toward tunnel junction #10. The
apparition of Jacob Marley can be seen approaching in the
distance. There's that sewage line again at right-- I just can't
say enough about it!
|
When
I arrived at 724-C in 1999, this is how the entrance to the antenna
tunnel looked. It hasn't really changed much since then save for
a few minor things. During the site's operational period, there
was a steel bulkhead and a nice wide door closing off the tunnel.
Salvagers
cut away the bulkhead on the left of the doorway to remove the
piping. I guess they took the door with them as well.
|
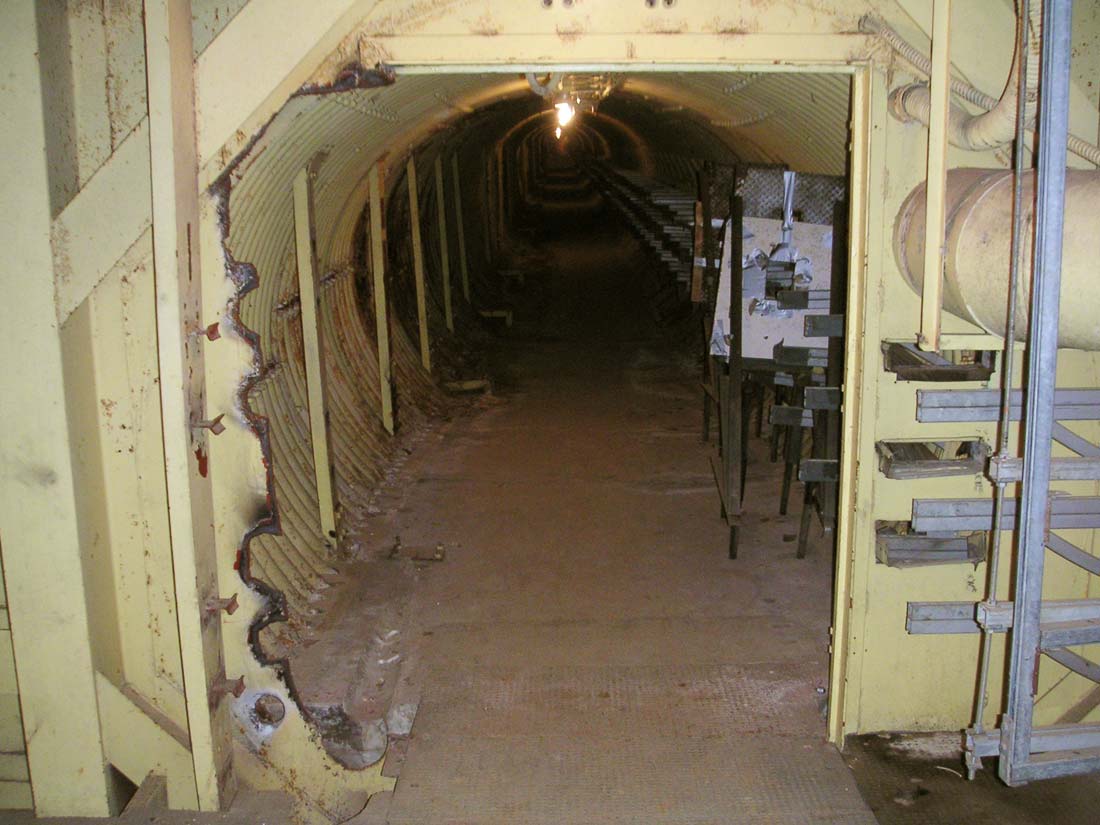
August
2005: Looking
into the antenna tunnel from tunnel junction #10. I assisted the
ACoE on a job at 724-C and took some more recent photos including this
one. Notice that there are working lights roughed into the antenna
tunnel.
|
Sections
of the antenna tunnel, despite their age, look quite well. This
is not one of them, but it does show some of the steel targets left
behind by defense contractors. These constructions were used for
ballistics tests where weapons were fired down this long tunnel.
This sort of junk littered the main junction, Powerhouse and parts of
the Control Center.
In
the picture below, notice the apparent distortion of the tunnel as if
it is oval in shape. Its not an illusion! The
tunnel has actually been deformed out of round by the immense
weight of earthen backfill resting on it. This is not a new
development however!
When backfill operations were performed,
the inside of the tunnel was shored up with large timbers to help bear
the sudden weight of thousands of tons of earth being replaced
overhead. The timbers splintered, compressed and some even broke
as the tunnel was squashed. The concrete in the bottom cracked
and broke until eventually the settling and deformation slowed enough
that engineers felt it was safe to remove the supports (and repair the
damage).
As
you can see, the tunnel is very visibly deformed in this view near
tunnel junction #10. Further ahead, the distortion is very
slight and the tunnel looks perfectly round. There was a little water
seepage here, but further up the the tunnel is bone dry and quite
clean.
|
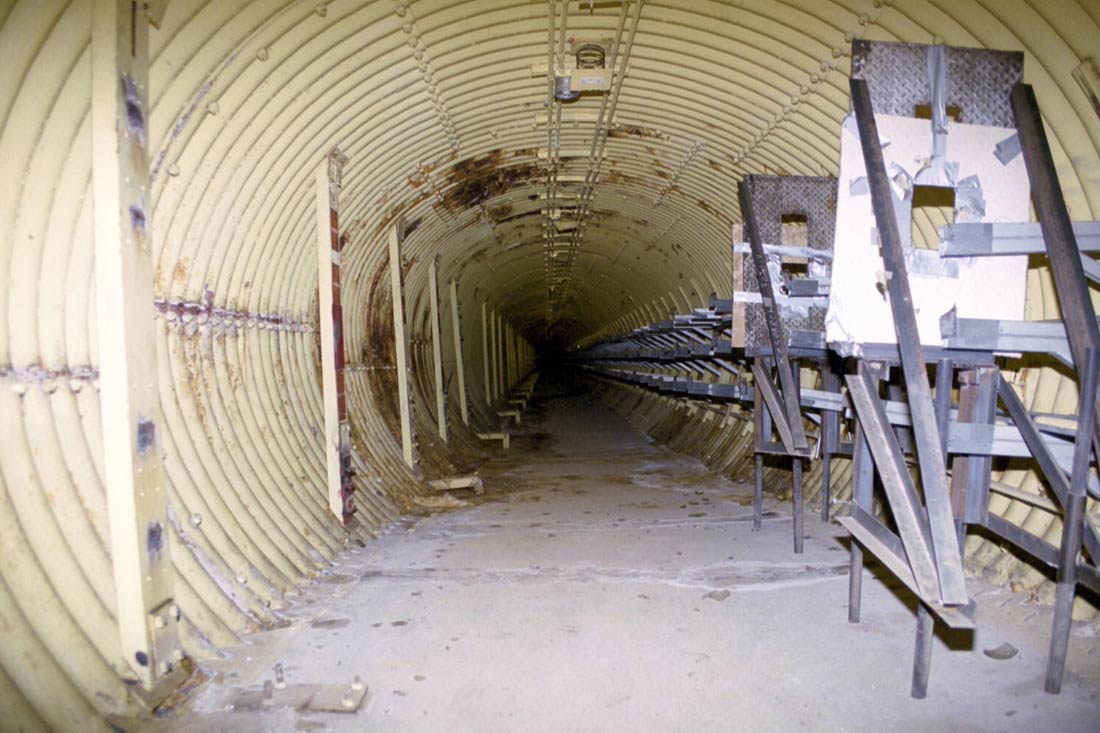
The
walls closing in. The floor is somewhat buckled in this section
and there's a fair bit of corrosion up ahead, but only for a short
distance.
|
The
construction method used at the Titan I sites was largely done by
excavating the site to the desired depth and once the tunnels and
structures were in place and complete, the entire area was filled back
in with the displaced soil which was then tamped, compacted, vibrated
and otherwise compressed over and around the newly buried
complex.
|
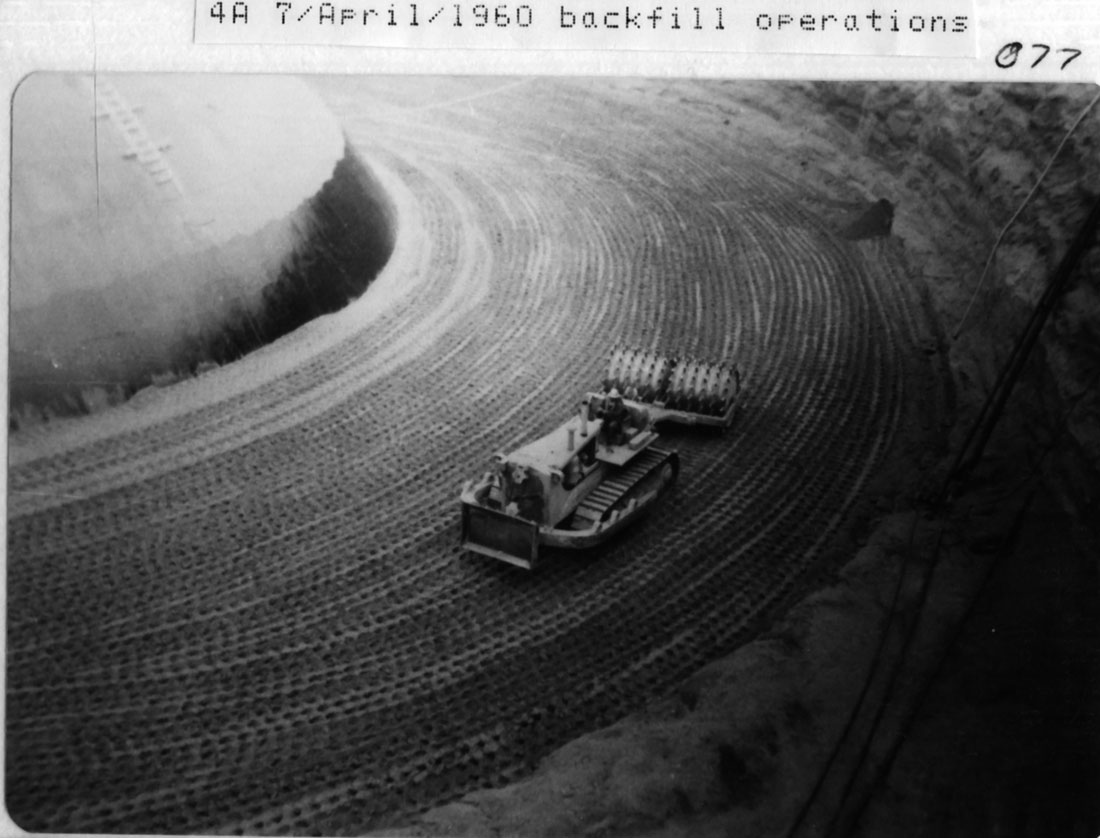
Backfill
and soil compaction at 724-A
Photo
courtesy of Fred Epler
|
Compaction
of the soil was crucial to minimize settling not only of the soil but
of the underground tunnels and structures themselves. Of course
some settling was inevitable and was a problem at all the Titan I
sites to some degree as you can see in the following construction
photos of 725-A.
|
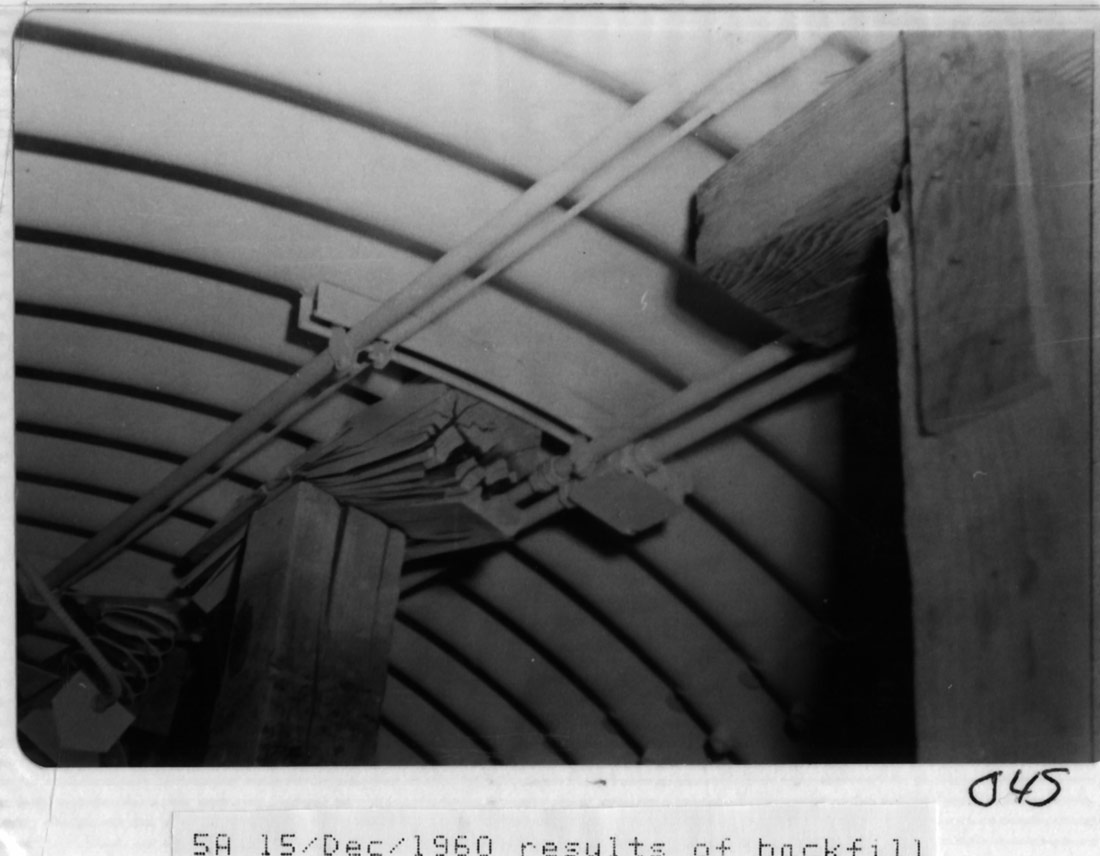
This
photo shows a large support timber perhaps 6" x 8" that has
been absolutely crushed to splinters by the sheer weight of soil bearing
down on the tunnel following backfill and compaction at 725-A. Photo
courtesy of Fred Epler
|
Not
only were the tunnel sections deformed by settling and the enormous
weight of soil and compaction, but different sections of the complex
would move in relation to each other where they were supposed to
connect. These problems caused numerous headaches for the steel
workers, engineers and Martin Co., the prime contractor, as many
additional work hours, design modifications and physical changes to
the structure were required as a result of uneven settling.
|
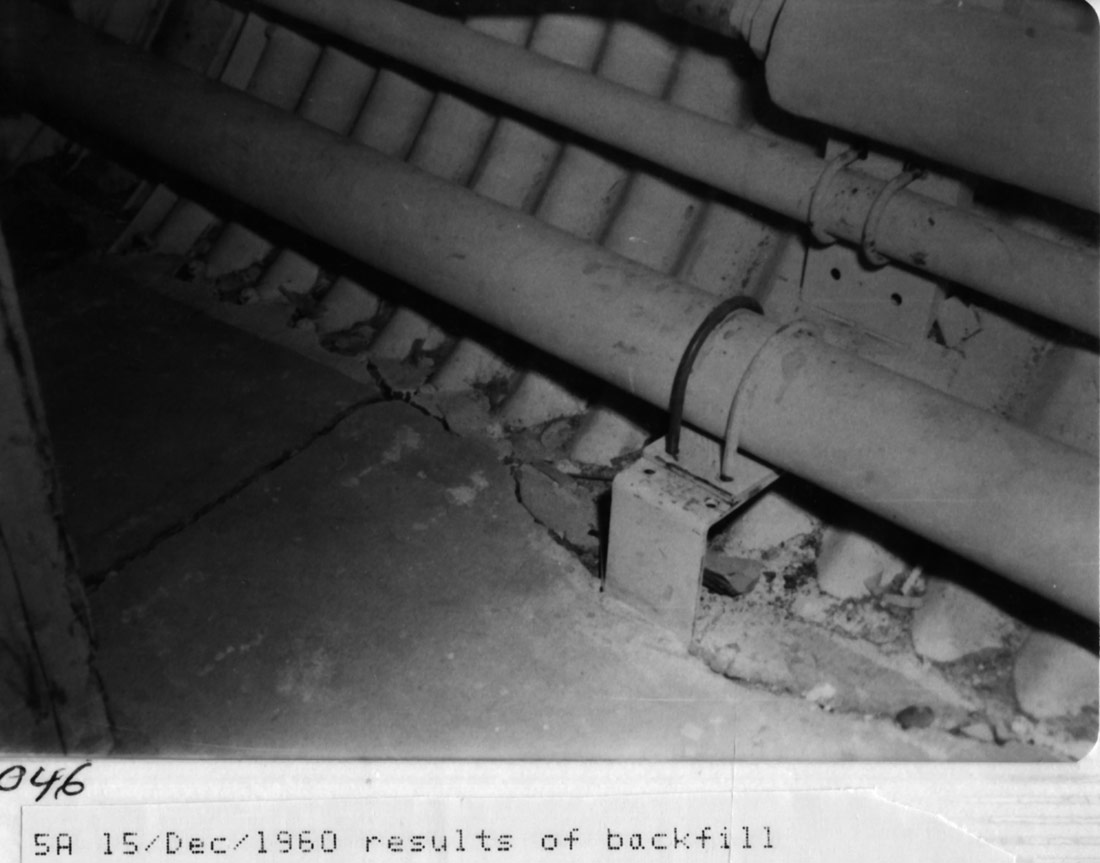
Fractured
concrete floor in the antenna tunnel caused by pressure from back-filled
soil
Photo
courtesy of Fred Epler
|
|
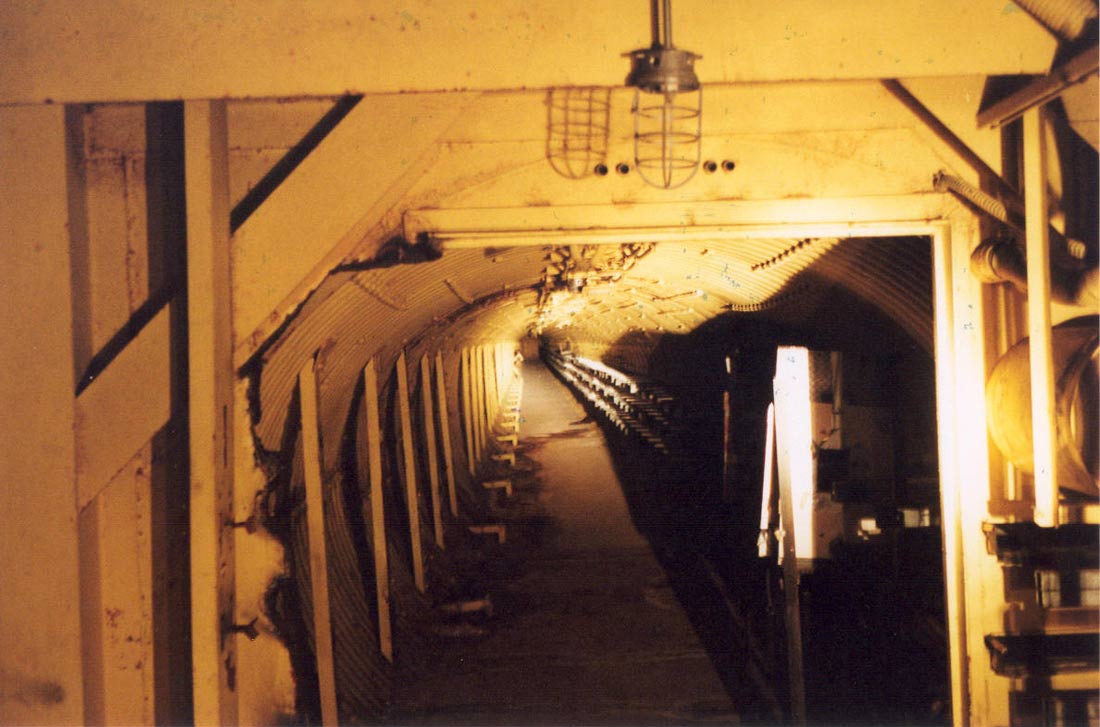
Circa
2000: the entrance to the antenna tunnel, dark and spooky with no
working lights
|
|
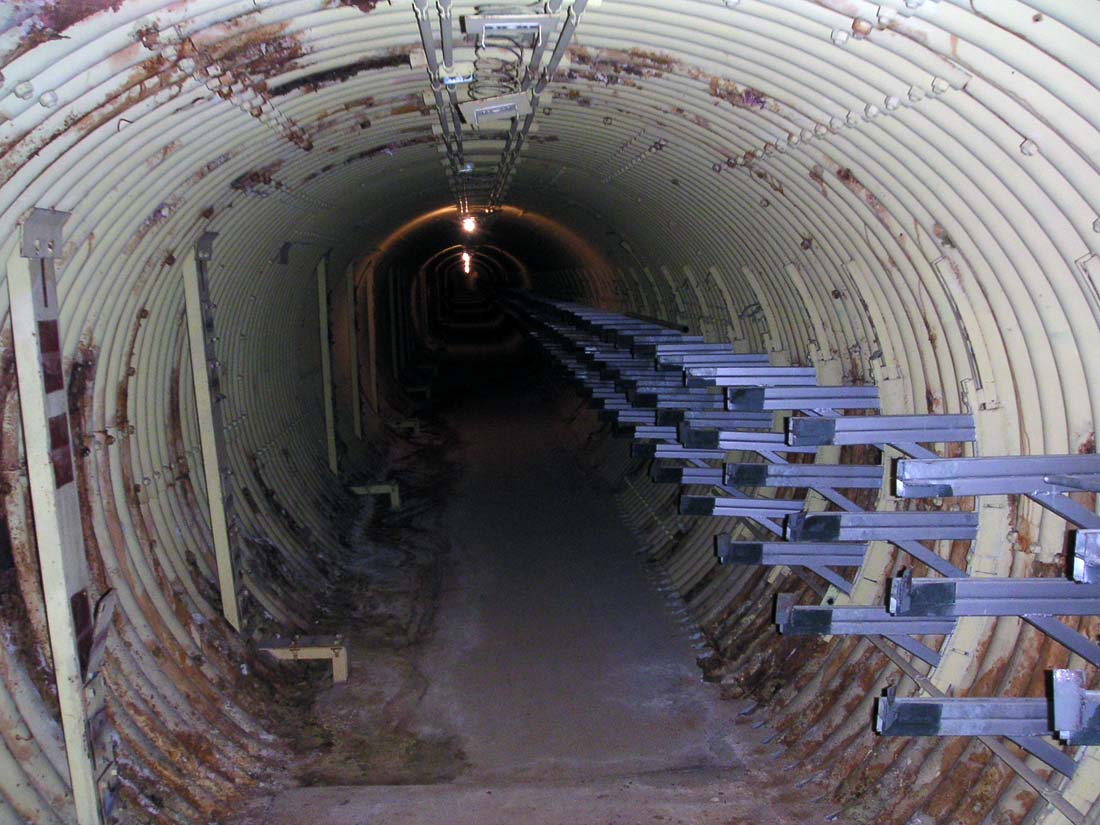
2005:
The first section of the tunnel showing water seepage and corrosion
|
|
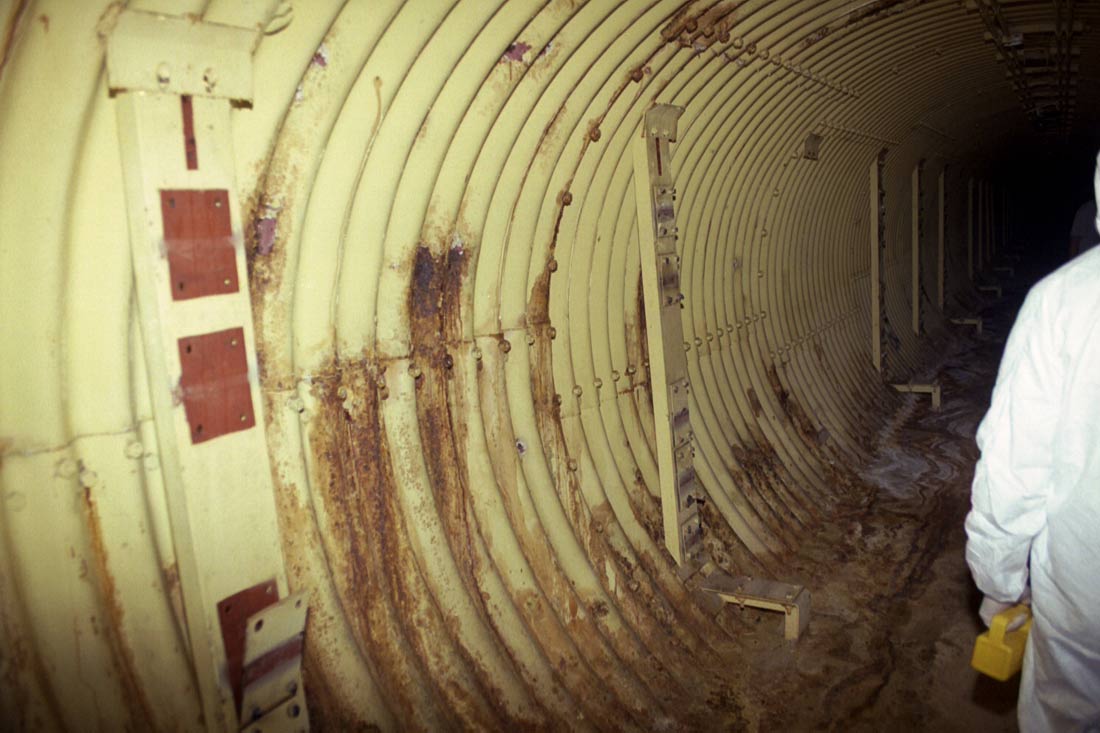
Salvage
crews removed piping and conduit which once ran along the tunnels.
Yes, that's me in the bunny suit.
|
When
I first entered 724-C in 1999, the prospective buyer (not me) and myself were both very
concerned about asbestos and other possible (and unknown)
environmental hazards present in the site.
To
protect ourselves, we each donned a Tyvek suit with a hood and built in
booties, a full-face respirator with filters rated for asbestos and
other hazards and double layers of rubber gloves.
A
bit overkill perhaps? Probably. Hot, uncomfortable and
restrictive to move around in? Very much.
|
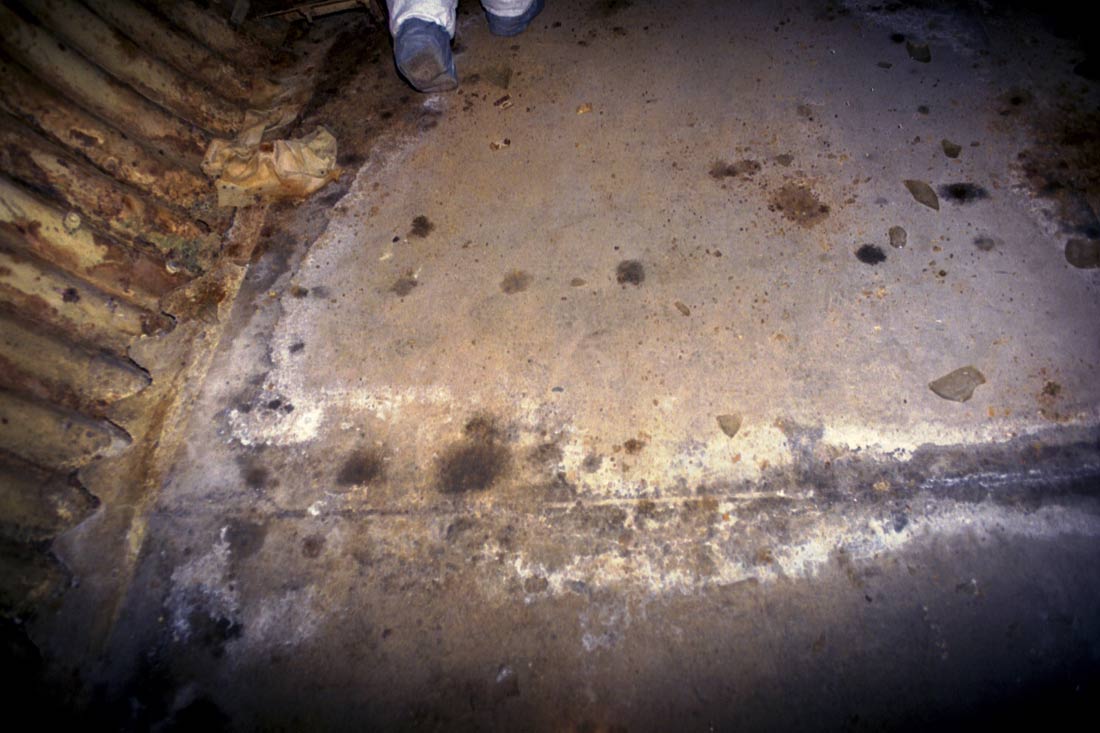
Tunnel
floor near the entrance of the antenna tunnel with retreating feet clad
in a protective Dupont Tyvek suit.
Tyvek.
Not just for vapor barriers anymore!
|
We
also carried at least 2 flashlights and multiple sets of replacement
batteries as well as 2 or more emergency chemical light sticks.
As
you can see in the photos, not everyone shared our fears.
I
confess that over time, even I
became a bit lax in my precautions, not wearing a full suit or gloves
and at times even foregoing the respirator-- something I really
wouldn't recommend unless the air quality has been tested and shown to
be safe.
|
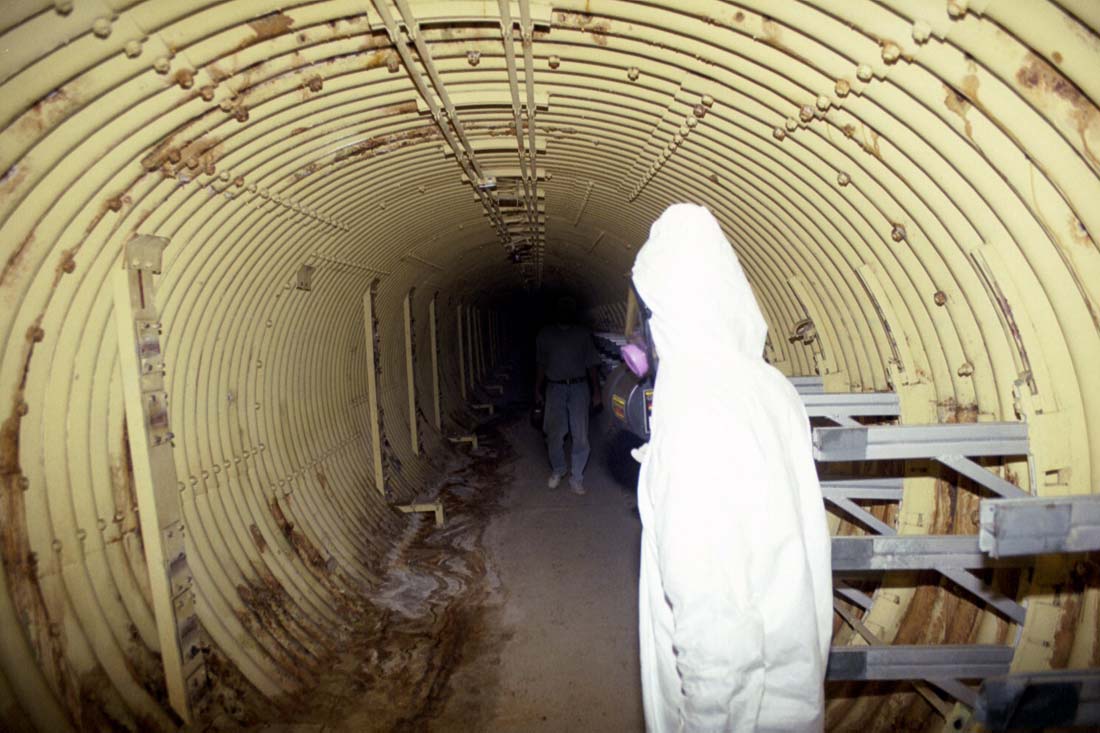
"Who
goes there?"
Morlocks
approaching from the antenna terminal?
Nope, false alarm.
|
|
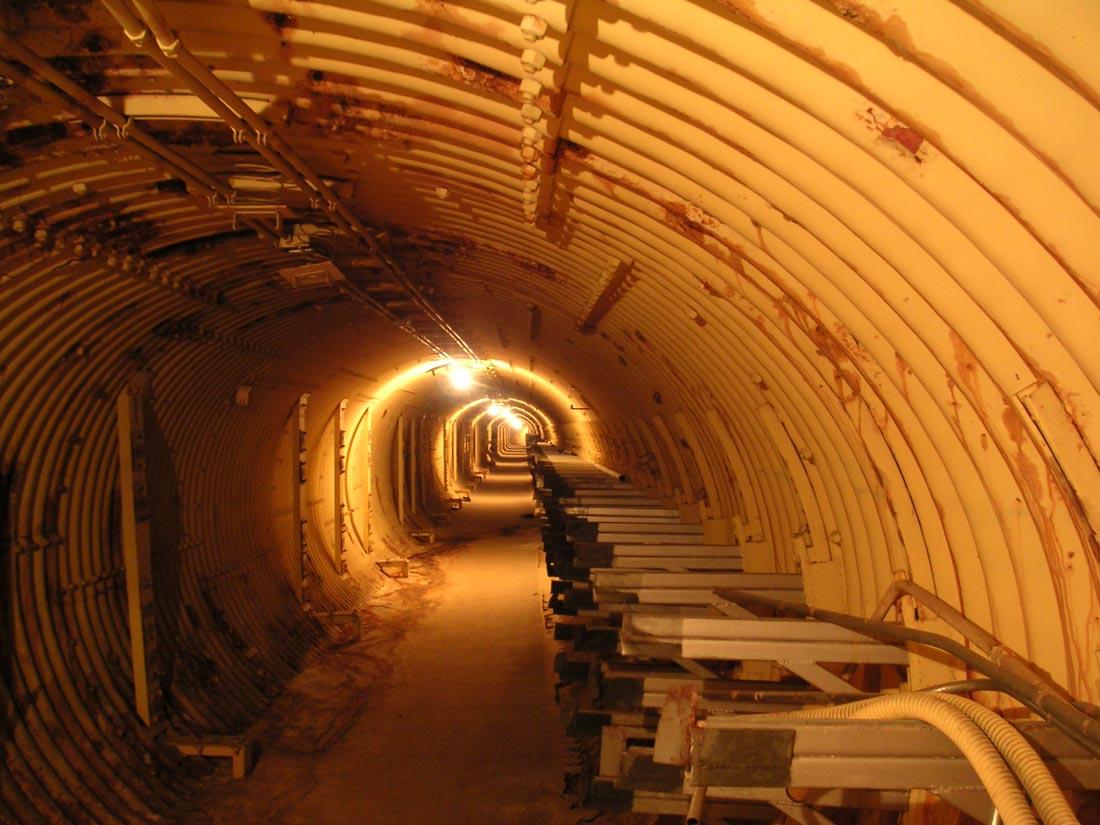
2005:
The recently-added lighting allowed me to get a few nice slow exposures
which turned out rather well even in the low light.
|
|
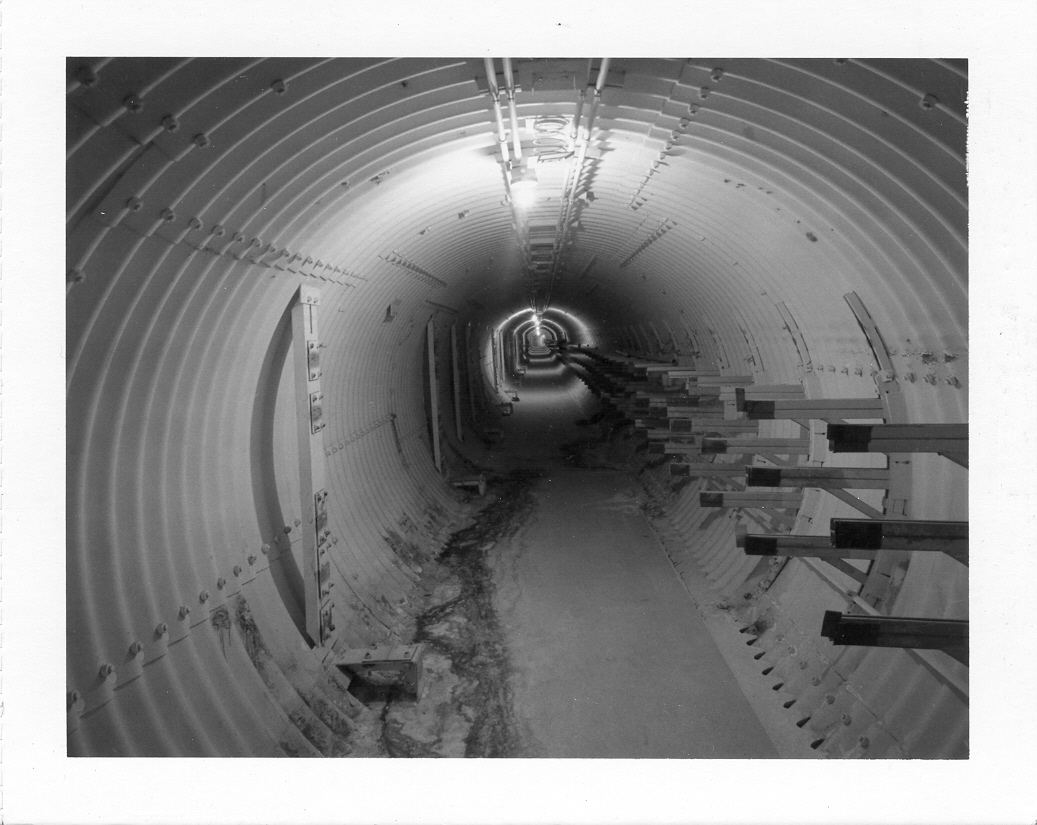
A
nice B&W test print taken by someone infinitely more skilled and knowledgeable
with photography than myself.
Photo
by Harry Weddington
|
|
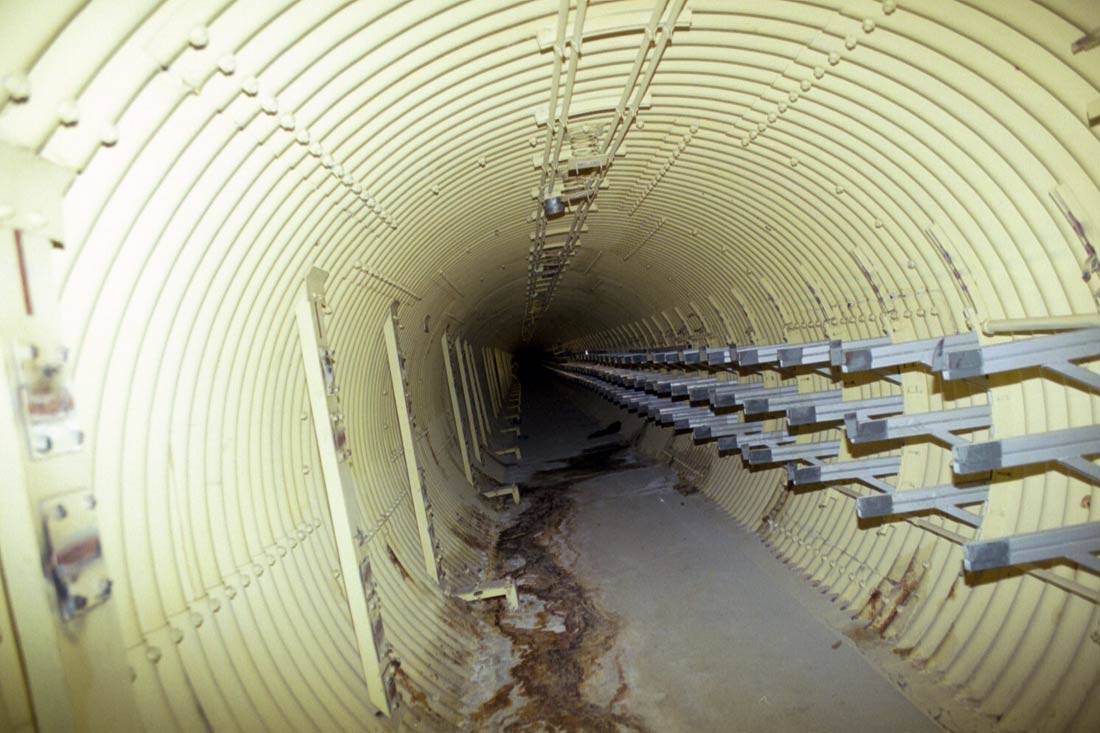
Photographed
in "Drunk-O-Vision", this skewed shot shows some nasty
seepage, but directly past this spot, the tunnel is almost
immaculate. Notice how the tunnel is looking more and more round as
we go further in.
|
|
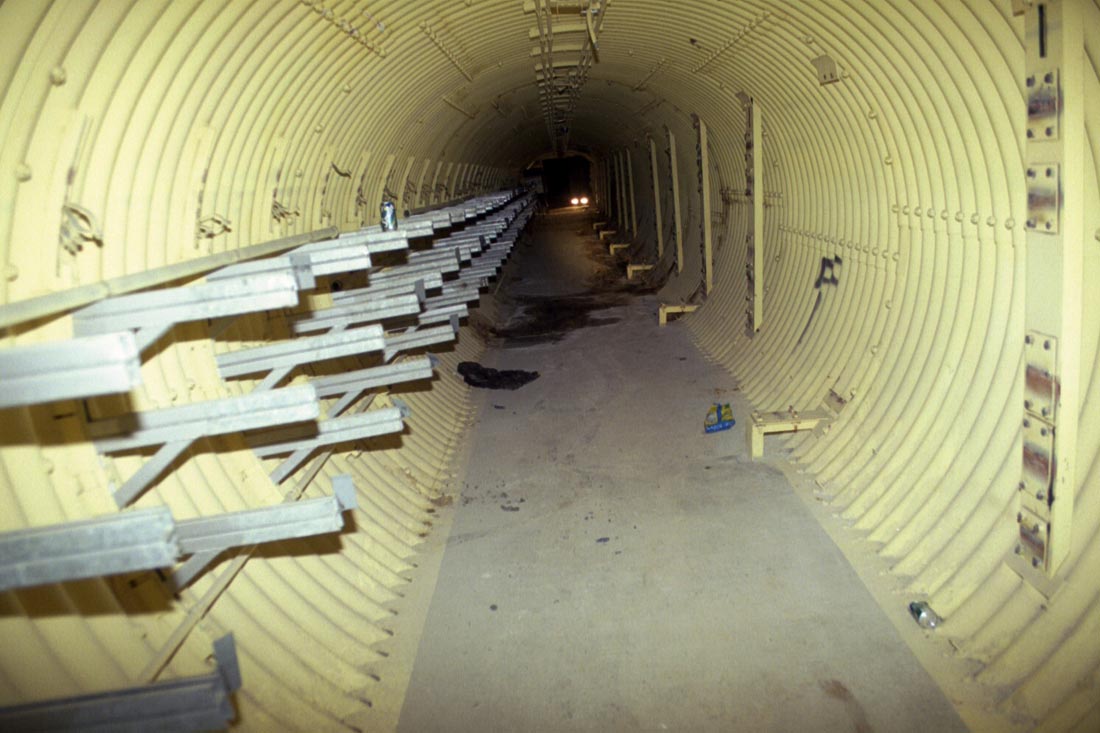
Circa
2000: Looking back toward the main tunnel junction
|
|
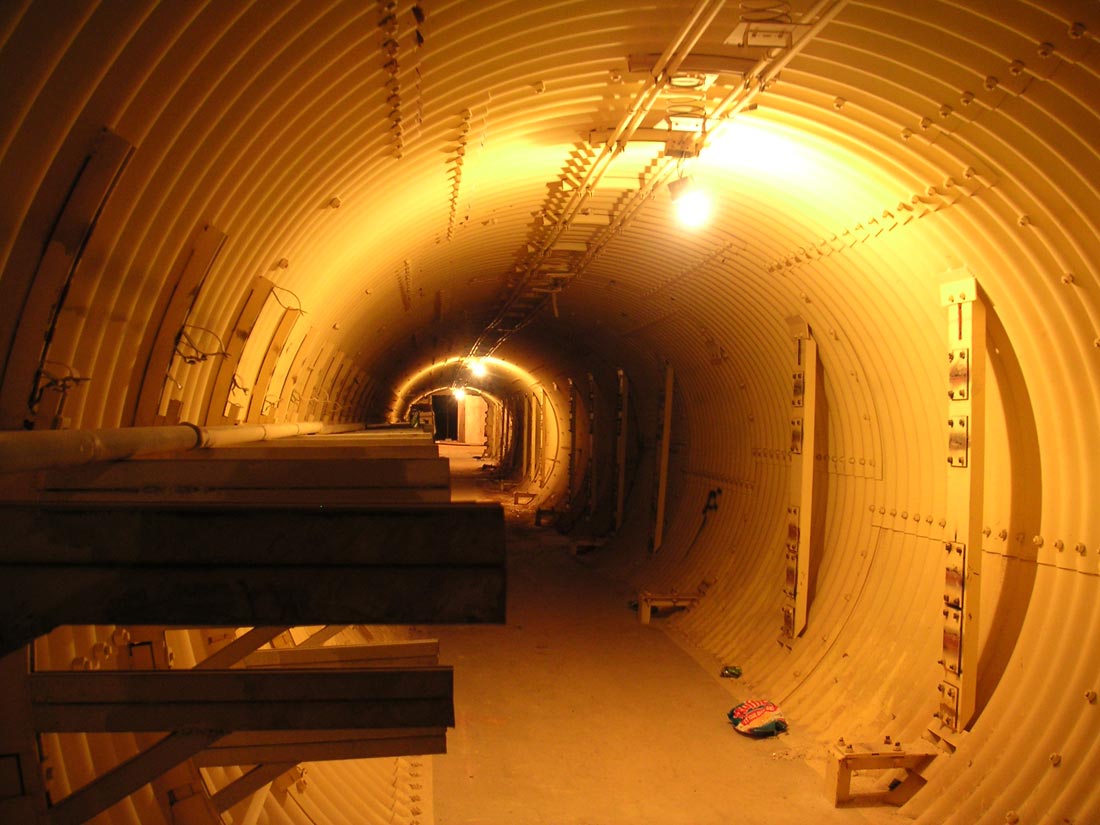
2005:
Looking back toward the main tunnel junction with a long exposure
|
As
you get past the first 40 feet or so, the tunnel clears up very nicely
and is quite pristine. There was some junk left behind-- an old
chair, some soda cans and broken glass, but that's about it.
NOTICE:
It is an important fact that eating, drinking or smoking in
contaminated areas is the best way to expose yourself to any harmful
substances present, so avoid doing so at all costs.
|
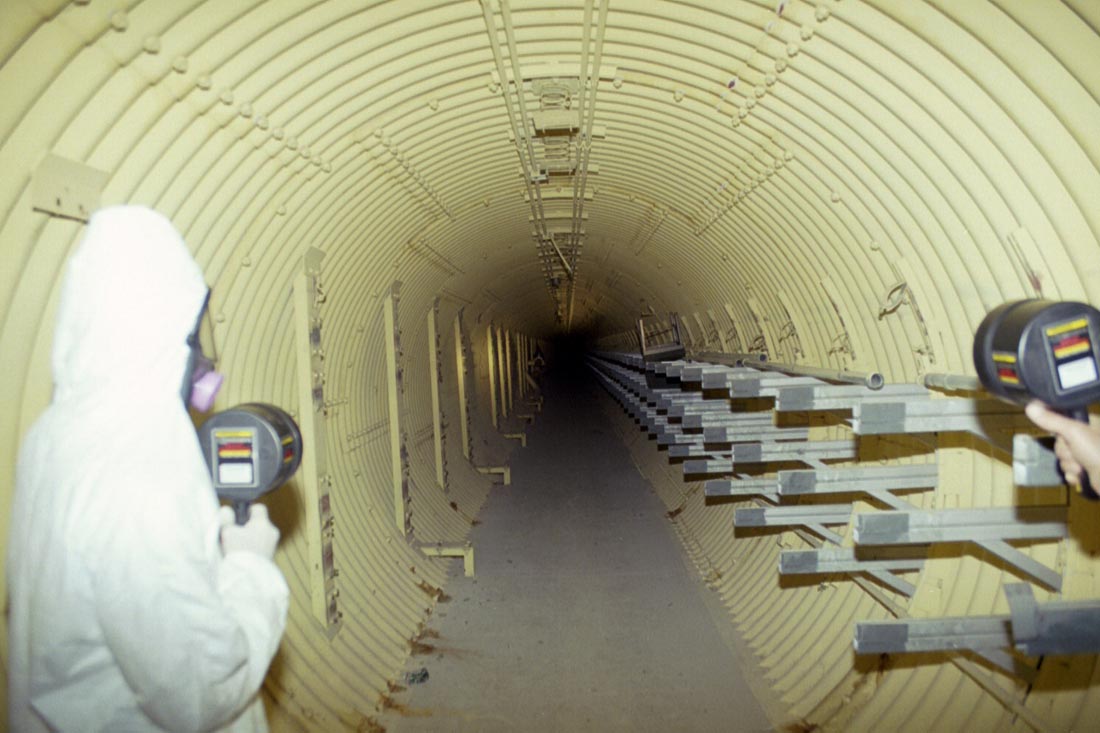
Silo
Gnome and pal try to see light at the end of the tunnel. No
luck yet... This is about 1/3 to 1/2 the way down toward the
terminal. Here one cannot discern any deformation of the tunnel
liner. The elevation of the tunnel is gently sloping upwards as
one approaches the silos, so perhaps the reduced weight of backfill
could possibly be attributed to this.
|
|
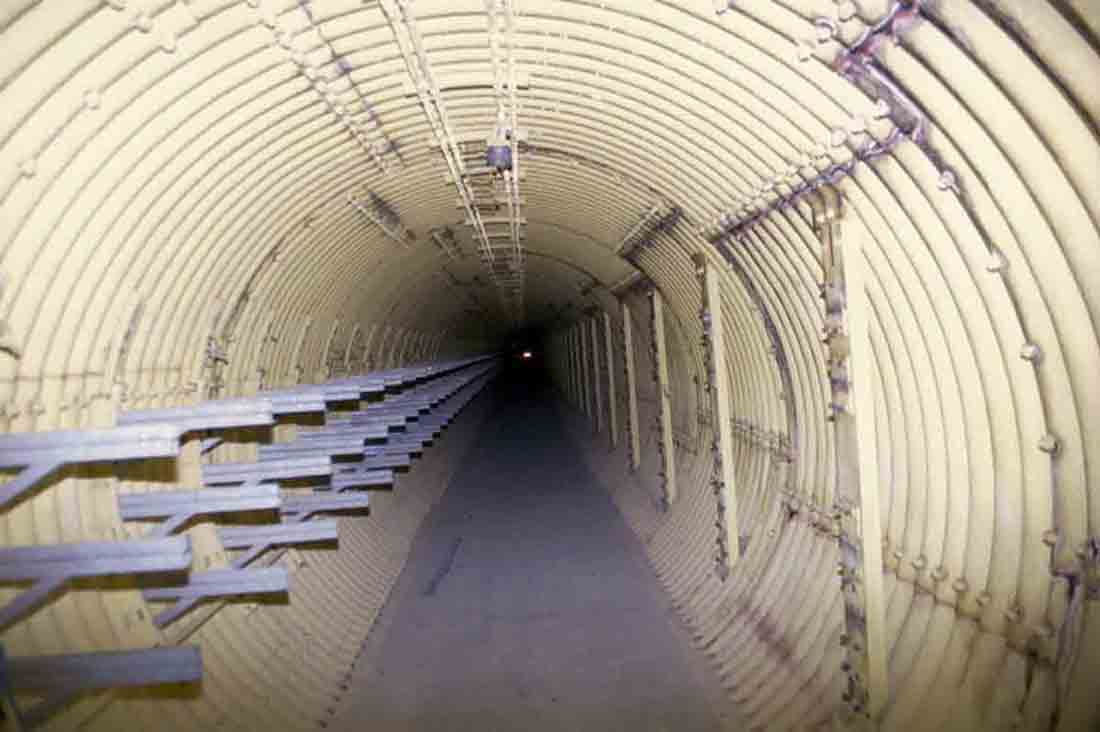
Looking
back toward T.J. #10: A high-intensity work light is barely
visible off in the distance
|
I'm
still surprised by the tidiness of this area. The only corrosion
is around the weld joins in the corrugated liner.
|
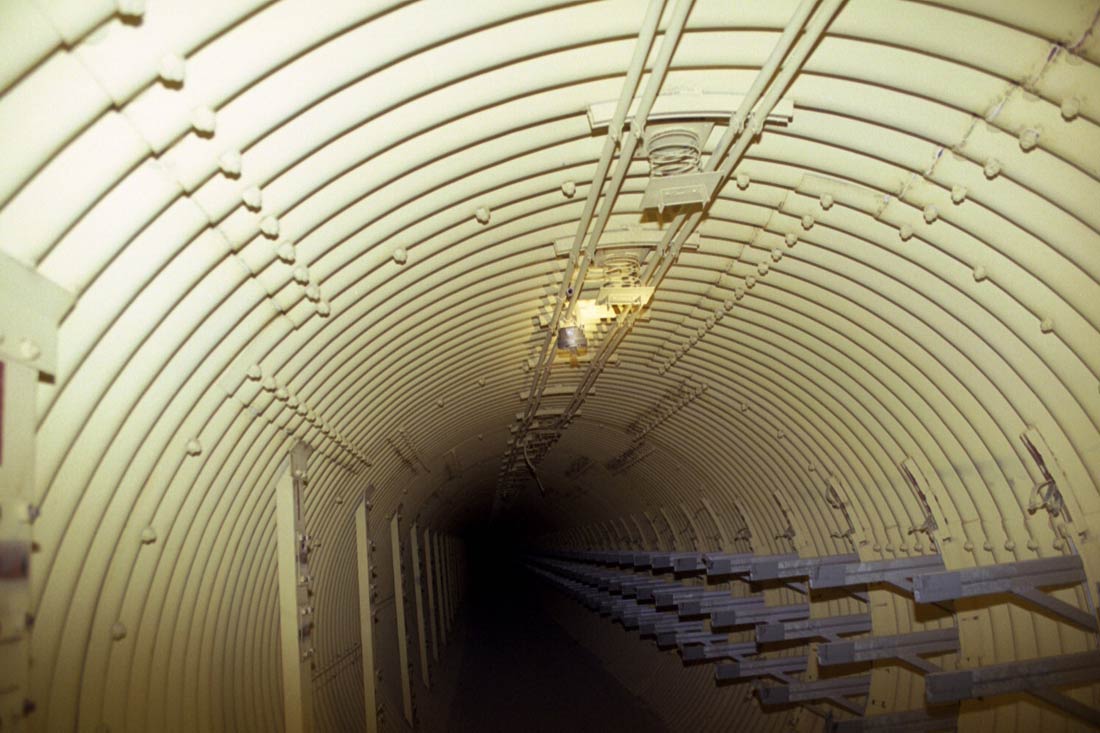
Continuing
toward the antenna terminal, the dark tunnel offers no hint of just how
much further it is to the end.
|
|
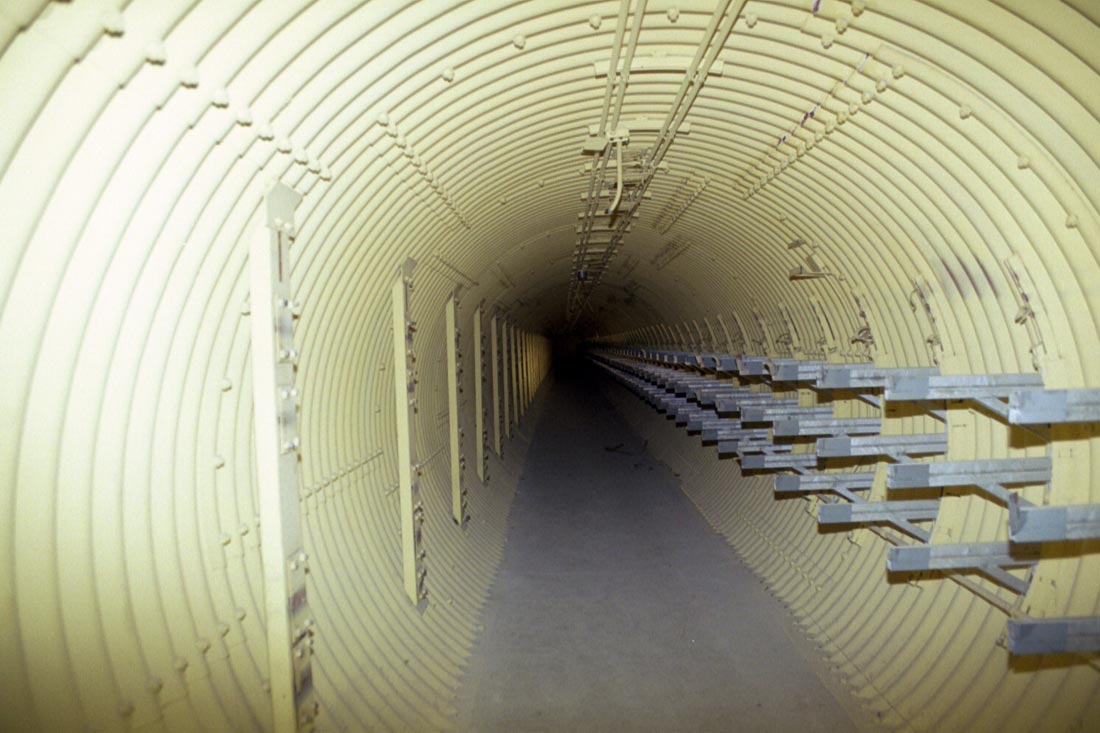
More
remarkably clean and dry tunnel. Surely there is an end to this
somewhere ahead.
|
It
is fortunate really that the sides of the tunnel are different.
It is not hard to imagine getting turned around while looking at small
details and then forgetting which direction is the way out and which
is the way in. If you pick the wrong direction you've got a long
walk once you discover your mistake.
|
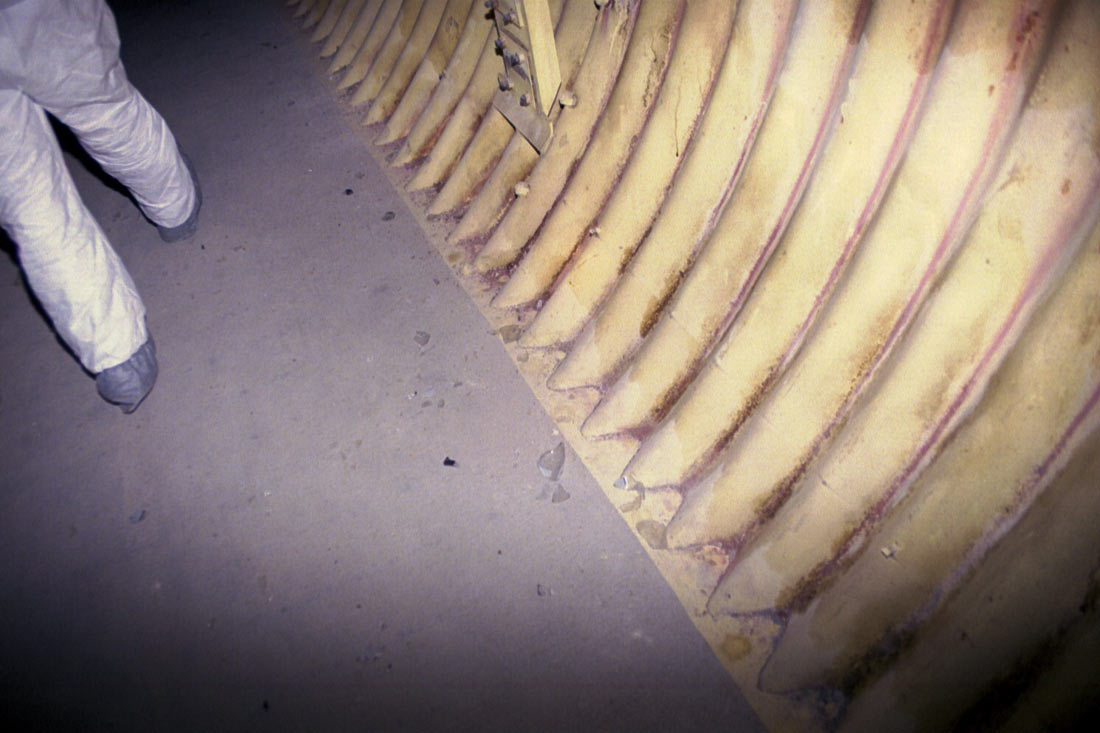
A
little dust, a little rust, and a smattering of broken glass
|
|
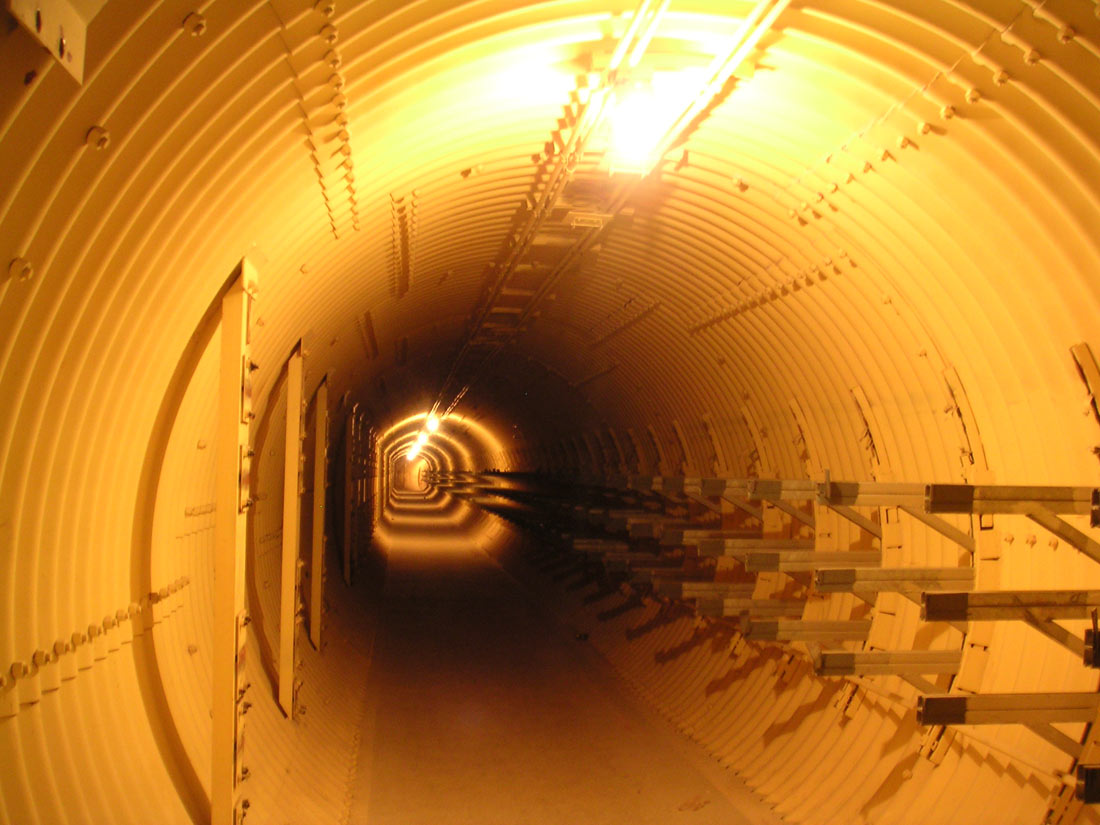
2005:
Suddenly, up ahead something finally comes into view!
|
After
a long walk accompanied by the odd muffled reverberations of our
footsteps along the tunnel, the end becomes visible at last!
|
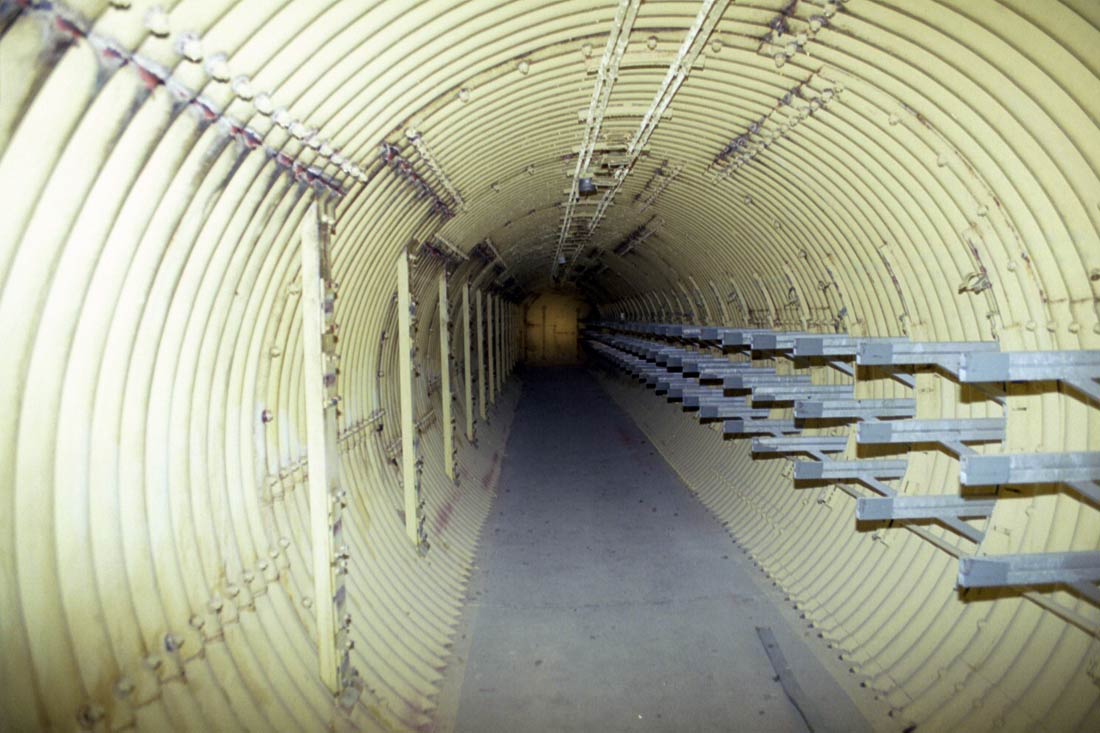
Ahead,
the tunnel takes a jog to the right just before the antenna
terminal. Almost there!
|
|
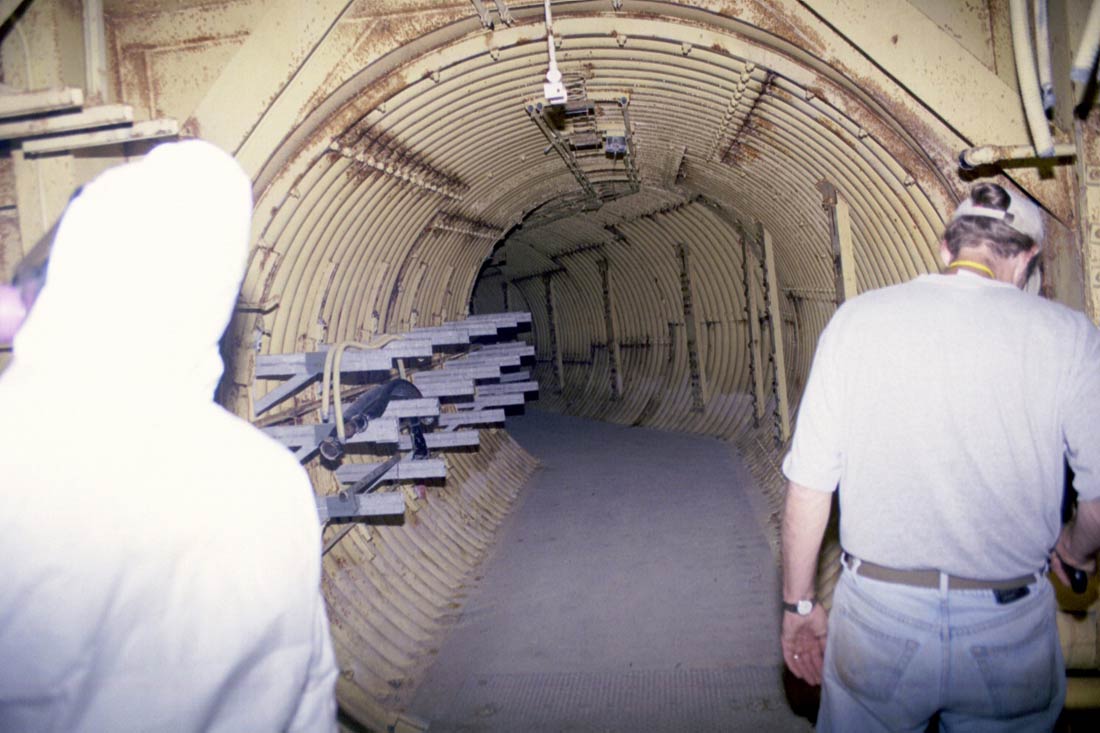
Looking
from inside the Antenna Terminal down toward the main junction (T.J.
#10). At the terminal end, there is about a 30 degree bend in the
tunnel just before it joins the terminal. That's what you're
seeing here. Notice how the corrosion is becoming more visible
again at
this end. There's water nearby and the increased humidity is
working on any exposed metal.
|
|
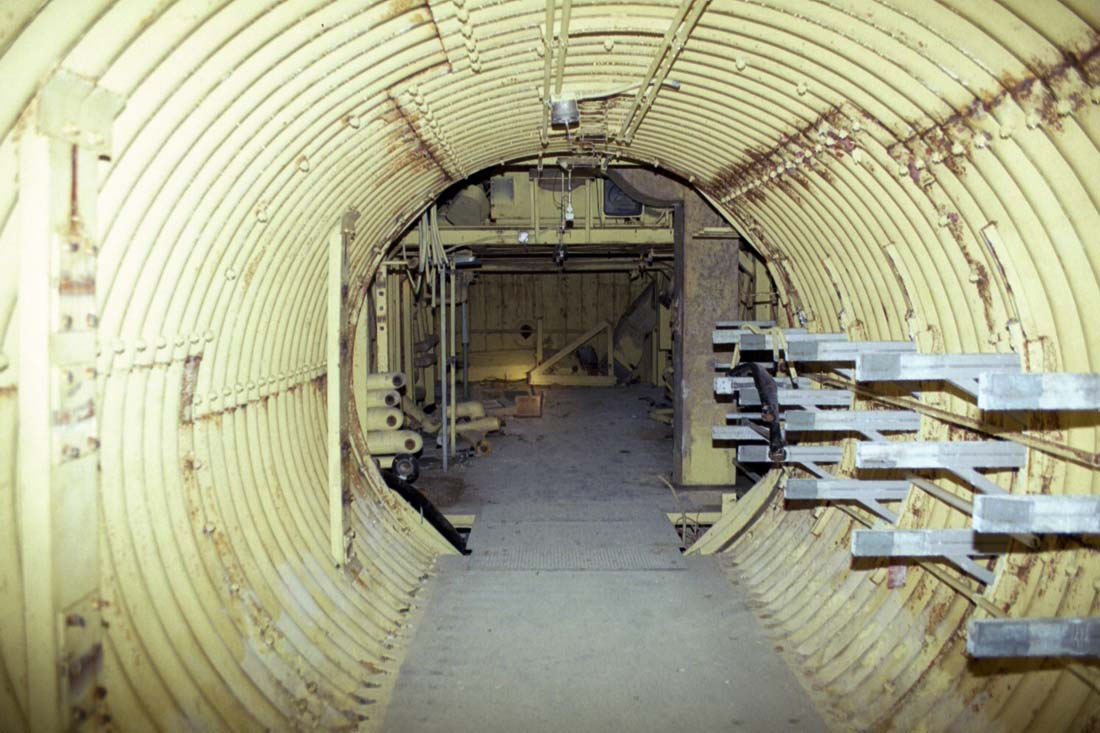
Circa
2000: Looking into the antenna terminal from the tunnel
|
Now
it's time to take a look around the Antenna Terminal itself. Click
the link below to continue or you can go to the map
to look around elsewhere.
Antenna
Terminal

|
Contact
| Site Map | Links |
Hosted by
InfoBunker

